 |
|
|
The Badge Man Theory - An Analysis There is little question that the program most responsible for the proliferation of the Badge Man theory is The Men Who Killed Kennedy. More than ten years after its initial broadcast in the United States, The Men Who Killed Kennedy remains one of A&E Cable Network's most requested series. Herein I’ll examine the many claims about Badge Man, Hard Hat Man, and the figure identified as Gordon ARNOLD, and detail the results of a number of photographic tests that have been performed to uncover the truth about Badge Man. Image Quality and Size There are two major impediments to obtaining image enhancements of the MOORMAN photograph (neither of which were mentioned in The Men Who Killed Kennedy program) - the quality and size of the original image. First, few people realize that MOORMAN's original Polaroid photograph faded long ago, due to the fact that the fixative coating that seals the picture had been delayed or improperly applied to the photograph on the day of the shooting, [66] rendering the original photograph useless for later enhancement work. MOORMAN's Highlander Model 80A Polaroid camera was designed to accept Polaroid's series 30 film and produced eight prints. One consumer publication of the period said that the pictures produced by the camera were of "the quality one would expect to obtain by use of an inexpensive box camera in the $6 to $15 price range." [67] According to the camera's instructions, after making an exposure the camera operator pulled the end of the film roll through two rollers which pierced a pouch containing the development chemicals and applied them to the film. The operator allowed the developing process to continue for 10-seconds, then peeled the print away from the development pouch, thus preventing any further development. Within two to five minutes, the operator, using a sponge applicator, was required to apply a coating of polymer and acidic solution which prevented further development and gave the image a durable surface. If the procedure was not performed, the image was liable to darken and the surface would be susceptible to fingerprints. If the coating was applied too quickly, the print would become over-exposed and take on a brownish tint. [68] It is evident that, in the excitement of assassination, the fixative coating was applied to MOORMAN photograph No.5 improperly or much too late. Consequently, the original Polaroid's fine detail has substantially faded and will continue to fade until the image is invisible. [69] It wasn't until 1982 - nineteen years after the assassination and long after the original MOORMAN photograph had begun to fade - that MACK, while examining a slide of a good quality print of the MOORMAN photograph, first noticed the figure that would later become known as Badge Man. The slide had originated with conspiracy theorist and author Josiah THOMPSON who made it from a print found in the files of United Press International (UPI). [70] As detailed earlier, UPI had obtained a copy negative of the MOORMAN photo the day of the assassination when Dallas Times Herald reporter Harry FEATHERSTONE had a Times Herald photographer snap several photographs of it in a photo lab shared with UPI. [71] Fortunately, the copy negatives (several were made) created by UPI that day had captured the condition of MOORMAN's photograph before it began to deteriorate and it was prints from the best of these negatives that ultimately became MACK and WHITE's best hope for any enhancement work. Although considered to be the best available prints, even these UPI versions were doomed to be slightly blurred versions of the original. Why? According to British photographic expert Geoffrey CRAWLEY, who analyzed the original MOORMAN photograph and the UPI prints for Central Independent Television, the chemical used by Polaroid to seal and fix the image to the photographic paper inadvertently also causes all successive copies to be slightly blurred. "So, all of the reproductions of the original [MOORMAN] image you may have seen are noticeably less sharp than the original," CRAWLEY says. "I remember this very clearly because at the time, with the British Journal of Photography, we found that we couldn't reproduce really well from a Polaroid of that era for this very reason. That once it got in front of the camera there was something about, I forgot what it was, it was zinc something - which was used to seal the print, actually diffused it. The eye looks through it when you have an original print. But when you copied the darn thing it goes very slightly fuzzy." [72] In short, the UPI negatives used by MACK and WHITE in 1982 to develop the Badge Man, Hard Hat Man, and Gordon Arnold images (which remain the best available copies to date) were inherently blurred by the copying process used in 1963. Second, in addition to the limited image quality, the area of the photograph in which the three figures appeared is incredibly small, much more so than most people realize. In The Men Who Killed Kennedy, Jack WHITE tells viewers: |
| JACK WHITE: ."..So, the area that Badge Man appears in is very tiny and that's why the attempts to enhance it photographically have been very difficult over the years..." [73] |
| How tiny? MOORMAN's original Polaroid print is just 2.5 x 3.25 inches, including the 0.375 inch white border that surrounds the entire photograph. The image area is even smaller, only 2.125 x 2.875 inches. The portion of the image that contains all three figures is smaller yet, only 1/4 of a square inch in size. The figures themselves are even more microscopic. The head of the Badge Man figure measures only about 1/69 of an inch wide. [74] |
 |
|
Considering the size of the image area containing the three figures, the severely faded original photograph, and the inherent fuzzy nature of the UPI copy negatives produced in 1963, it is difficult to see how anyone could hope to develop an enhancement of any real value. Expert Verification? In The Men Who Killed Kennedy, the program narrator, in rather dramatic fashion, informs the viewer that MACK and WHITE's work has been confirmed by photographic experts:
The "independent experts in Great Britain" referred to by the narrator are, in fact, one expert: Geoffrey CRAWLEY, the British photographic expert best known for his debunking of the Cottingley Fairy photographs which had circulated in England between 1917 and 1920 as "proof" that fairies existed. In late 2001, I contacted Geoffrey CRAWLEY, then sixty-six, in London and talked with him about his involvement with The Men Who Killed Kennedy series, and in particular, his work to verify the Badge Man image. CRAWLEY revealed that contrary to statements made in The Men Who Killed Kennedy, he did not authenticate the Badge Man image. In fact, the study CRAWLEY conducted destroyed the central thesis of the MACK/WHITE allegation. Hired by Central Television producer Nigel TURNER, CRAWLEY was flown to the United States in July 1988 to verify or disprove Gary MACK and Jack WHITE's claims about the Badge Man image. Through MACK, CRAWLEY gained access to MOORMAN's original camera and print, which was being stored in a safe-deposit box. CRAWLEY's first task was to make a few photographs using MOORMAN's original camera that could be used for comparison purposes. Since Polaroid film for MOORMAN's Highlander Model 80A Polaroid camera was no longer being manufactured, CRAWLEY figured out a way to get the camera to run TRI-X black and white negative film, which was widely available. The main problem CRAWLEY faced was finding a way to make multiple exposures using TRI-X film, since there was no practical way to advance a modern roll of film in MOORMAN's camera. CRAWLEY ultimately decided to use a camera changing bag, a special lightproof, black cloth bag used by professionals for field work, to get around the problem. First, CRAWLEY would load a roll of TRI-X film into the camera, make a single exposure, then use the changing bag to remove the film, change to a second roll for a second exposure, and so on. In this way, CRAWLEY would be able to make multiple exposures without leaving Dealey Plaza to change film. [76] With assistance from MACK and WHITE, CRAWLEY went to Dealey Plaza and made a series of photographs from MOORMAN's position, using her original camera. CRAWLEY also took a number of stereo photographs from MOORMAN's position using a second camera mounted on a sliding plate from which he could capture left and right-eye views. All photographs were made using a camera tripod. In addition to the images, CRAWLEY made a number of measurements (i.e., the distance from MOORMAN's position to the concrete wall, the fence line, etc.) to be used in his later analysis. Through special arrangements with Mary MOORMAN, CRAWLEY was granted permission to take her original print back to Great Britain for further study. He was also given the enhanced prints that Jack WHITE had created from the UPI version of MOORMAN's photograph. Before returning to England, CRAWLEY met with Nigel TURNER at Jack WHITE's residence in Fort Worth to discuss many issues surrounding the case, including the three alleged figures in the MOORMAN photo. CRAWLEY was already skeptical that any of them, including Badge Man, were actual human figures but was reluctant to say so, especially while at WHITE's home. "I didn't really like to go against [WHITE]," CRAWLEY recalled. "I mean he was so full of, you know, the three figures on the mound, that I only did very gentle hints that I didn't agree with him." [77] |
 |
|
Upon his return to London, CRAWLEY began his study in earnest. CRAWLEY's primary method for authenticating the Badge Man image was to determine if the size of the image, as seen in the MOORMAN print, was consistent with the MACK/WHITE allegation that the Badge Man image was a human being standing behind the stockade fence. The mathematical formula CRAWLEY used is very common in photography and one that any professional photographer would have been familiar with. |
 |
|
The American Cinematographer Manual describes the formula as "a very simple way to calculate camera distance, object size, lens focal length, or [image size] dimensions." [78] The formula is commonly used by movie makers to calculate how far to place the camera from a subject. For instance, if filmmakers wanted to capture an actor on film from head to toe they could use the formula to determine exactly where to place the camera to accomplish that before the actor had even arrived on set. Simply put, the formula describes the relationship between the subject and the image captured on film. Four variables are used: size of the object being photographed, distance from the object to the camera lens, focal length of the lens being used, and the size of the object as it appears on the negative produced. If any three of the variables are known, the fourth unknown variable can be calculated with precision using variations of the formula. [79] In the case of the MOORMAN photo, CRAWLEY determined that the focal length [80] of MOORMAN's Highlander Model 80A camera was 100mm (4 inches). The measurements CRAWLEY made in Dealey Plaza showed that the stockade fence, where Badge Man was alleged to be standing, was 126 feet from MOORMAN's position. Finally, CRAWLEY measured the size of the Badge Man figure on MOORMAN's original Polaroid print. [81] Plugging these three variables into the formula will return a value equal to the actual size of the object called Badge Man. CRAWLEY found that the result showed that Badge Man would have to be a four foot, eight inch human being if he were standing just behind the stockade fence, and in fact, would have had to have been elevated to be seen above the waist, as shown in the MOORMAN print. However, this was not CRAWLEY's final conclusion about the Badge Man image. In the end, CRAWLEY concluded that if Badge Man were in fact a human being (something CRAWLEY doesn't believe - more about this in a moment) of average height [82] he would be located 12 to 18 feet behind the fence and elevated at a considerable height to be visible in the manner purported to be the case in the MOORMAN photo. [83] CRAWLEY’s conclusion is, of course, at odds with MACK and WHITE’s theory as well as claims attributed to CRAWLEY in The Men Who Killed Kennedy program. |
 |
|
As to Jack WHITE’s "colorized" [84] version of the Badge Man, Hard Hat Man, and Gordon Arnold figures, which was used extensively in The Men Who Killed Kennedy in an effort to help others see the three figures clearly and has since seen wide distribution on the Internet, CRAWLEY didn’t believe the colorized version was any more legitimate than the original images. "I never thought that stood up, actually," CRAWLEY says. "Again, it's the size of the image and the placing of them." [85] In addition to determining the location of the Badge Man figure, CRAWLEY also determined that it was impossible for "Badge Man to have fired the fatal headshot," as the program claimed. "I don't think from that distance, and the sight of a rifle, that it would have been feasible to do the head shot," CRAWLEY said in a 2001 interview. "And if you look at [photographs of people on the grassy knoll, who rushed there immediately after the headshot] you can see that their height in relation to the fence really proves what I've just been saying." [86] Despite CRAWLEY's findings, The Men Who Killed Kennedy program went to great lengths to convince viewers that such a shot was indeed possible. In the broadcast, Gary MACK is seen standing in the Badge Man position and declares, "Excellent view of the street from here. You can see the center lane which is where the President was. You can see that whole lane for almost the entire period. It's a great position to be in." Program footage showing Badge Man's point-of-view shows only one critical obstruction - the corner of the concrete retaining wall, which obscures the center lane of Elm Street (i.e., the lane occupied by the presidential limousine) at the moment of the head shot. [87] In the summer of 1991, during the filming of Oliver STONE's JFK, two former Marine Corps sharpshooters were brought to Dealey Plaza to advise Stone on trajectories and positions related to Badge Man and the HSCA acoustics firing positions. MACK later wrote: "I talked with both men and they thought either location was terrific. The Badge Man position required awareness that the corner of the concrete wall would block [Badge Man's] view of JFK for a fraction of a second, a problem they judged to be insignificant." [Emphasis added] [88] |
 |
|
Despite MACK's statement, my computer work for the project, Secrets of a Homicide: The JFK Assassination, shows that the "fraction of a second" referred to by MACK is indeed significant since it was at that very instant that the head shot was fired. In short, even if the Badge Man figure were a human being, he could not have fired a shot that could have hit Kennedy in the head. How did CRAWLEY's work come to be misrepresented? Unknown to Gary MACK and Jack WHITE, CRAWLEY submitted a written report to Central Television producer Nigel TURNER as part of their agreement. [89] The report shows that TURNER was aware that CRAWLEY's study refuted the Badge Man image, even though TURNER claimed in his program that "independent experts (again, there was only one expert - CRAWLEY) in Great Britain" had verified and duplicated the work of MACK and WHITE. Why would TURNER pay CRAWLEY to do a study and then, not release the results? "[My conclusions] didn't happen to fit in with the prescribed political statement that we were supposed to be making," CRAWLEY mused in 2001. "Nigel TURNER seemed to think that anything that could cast a doubt on the official view of the assassination would help toward getting the whole thing reopened and reappraised. And I think what he thought was, 'Okay, the Badge Man, it may not be true but at least if we set this hare running perhaps somebody will pick it up, perhaps it will lead to new reassessments,' and so on. I think that was his own justification." [90] CRAWLEY's experience with producers like TURNER is not unique. "I've been involved in other things on television, quite a number of investigations," CRAWLEY adds with a laugh, "and in every instance the producer's had his own political view - I don't mean political in the sense, you know, politics, but his own special view that he was going to put across come what may. And, you know, I've got rather fed up with it in fact. I'll be very much more careful in future as to what I'll get involved with." [91] Despite the fact that GARY MACK insisted that TURNER hire someone like CRAWLEY to perform a scientific analysis of the MOORMAN photograph, neither MACK or Jack WHITE ever spoke to CRAWLEY after he concluded his study. [92] Consequently, neither of them was aware of CRAWLEY’s final conclusions. Nor were MACK and WHITE ever aware that CRAWLEY had submitted a written report to Nigel TURNER. |
|
Re-Creating the Moorman Photograph I conducted an independent geometric study of the MOORMAN photograph as part of my computer animation project, Secrets of a Homicide: The JFK Assassination. Although I was unaware of the specific approach CRAWLEY used thirteen years earlier, I ended up duplicating his efforts and ultimately came to the same conclusion that the British photo expert came to - Badge Man, if human, was standing considerably behind the stockade fence. From the beginning of my interest in MOORMAN photograph No.5 and the Badge Man figure, I was always bothered by the claim that Badge Man was standing at the fence line, because, frankly, to the naked eye, the size of the figure in relation to the fence looked far too small to be at the location theorized by MACK and WHITE (i.e., standing immediately behind the fence). I knew from my computer and photography work that it was possible to prove Badge Man's exact position, assuming, of course, that the image of Badge Man was that of a human being of average height and build, and not the result of some other unknown phenomenon. The mathematical formula that was used to pinpoint Badge Man's position was one that I was familiar with and had used many times as a model rocket enthusiast. In 1971, I launched model rockets that were equipped to shoot still photographs of the ground from high altitudes. One of the mathematical formulas provided by the camera manufacturer allowed me to calculate the exact height at which these photographs were exposed. The formula, a rather common one used since the turn-of-the-century by cinematographers around the world was this:
I knew from experience that I could use this formula to calculate the distance between Mary MOORMAN's camera and the image known as Badge Man, assuming, of course, that the image was that of a human being. But first, I sought to get a basic answer to the question using computer models. To begin, I created a high-resolution version of the MOORMAN photograph by compositing together a cropped 5x7 inch FBI print of the MOORMAN photograph, [94] a low-resolution scan of the original MOORMAN print (including margins), and a high-resolution scan of vintage Polaroid film stock (ca. October, 1963). This high-resolution composite was then digitally resized to match the actual dimensions of MOORMAN's original print. The colorized version of the Badge Man, Hard Hat Man, and Gordon Arnold figures created by Jack WHITE was then sized to match the features of this high-resolution image. This process provided me with a high-resolution digital print of the MOORMAN photograph (which included WHITE's colorized version as an overlay) from which I could take measurements. In short, measurements from WHITE’s colorized version would be used to determine the size and subsequent location of the three figures. |
 |
|
Next, I used a computer model of Dealey Plaza, created for my project Secrets of a Homicide: The JFK Assassination, to position generic humanoid models behind the stockade fence so that they matched the position and size of the three figures (Badge Man, Hard Hat Man, and Gordon ARNOLD) depicted in WHITE's colorized version of the MOORMAN photograph. The software program used was Newtek's LightWave 3D, a professional 3D application used extensively in television, feature films, and forensic animations. LightWave allows the user to specify settings that mimic the photographic properties of real world camera lenses (in this case, MOORMAN's Polaroid camera), then superimpose actual images captured by those lenses onto a virtual three-dimensional scene (in this case, the computer model of Dealey Plaza). By aligning the fixed objects visible in MOORMAN's photograph (i.e., curbs, pergola, retaining wall, stockade fence, etc.) with their virtual counterparts, I was able to fix MOORMAN's position in the plaza at the time her photograph was exposed. Then, using WHITE's colorized version of her photograph, I positioned 3 three-dimensional generic humanoid models representing Badge Man, Hard Hat Man, and Gordon ARNOLD in the scene so that they matched the size and position of the figures depicted in the colorized photograph. Particular attention was paid to the Badge Man figure. Three points of alignment were primarily used (right and left eyes, and left ear) with two additional features (hairline and chin) used to support the selected position. The relationship of the three figures and the surrounding plaza was then viewed from multiple angles and measured. The results were as follows:
In all cases, the three figures are considerably behind the fence, which is 126 feet from MOORMAN's position. In fact, Hard Hat Man and the Gordon ARNOLD figure are nearly twice as far behind the fence as Badge Man, which means, of course, that even if the figures are human beings, they are not standing together. [95] |
 |
| Double-checking the results, I moved the dimensional models to the positions alleged by MACK and WHITE (i.e., at the fence line). In all cases, the size of the models clearly did not match the size of the figures depicted in the MOORMAN photograph (i.e., the models appeared larger than the figures in the photograph). |
 |
|
Next, I calculated the distance between MOORMAN's camera and the Badge Man figure mathematically by measuring the Badge Man figure on the digital MOORMAN print I'd created, and applying the formula described previously. Using this method, I determined that the distance from MOORMAN's camera to the Badge Man figure was 158 feet, 8.4 inches. [96] The margin of error in correctly positioning the Badge Man figure using either method is approximately 5.75 feet (i.e., plus or minus 2.875 feet). [97] This is largely due to the difficulty of accurately measuring the Badge Man figure as it appears in the original photograph. It should be reiterated that the entire image area of the original MOORMAN photograph is just 2.125 x 2.875 inches. The head of the Badge Man figure itself is only about 1/69 inches wide. [98] While the overall image is relatively sharp, the contours of the Badge Man figure are somewhat uncertain (due to the distortions of film grain and other photographic properties normally found in enlargements of this magnitude), making it difficult to obtain precise measurements. The margin of error compensates for the uncertainties in this variable. Applying the margin of error to the computer result (154 feet) yields a range of 151.125 to 156.875 feet. The margin of error for the mathematical result (158 feet, 8.4 inches) is a range of 155.825 to 161.575 feet. The combined range of the two methods is 151.125 to 161.575 feet, with the average being 156.35 feet. In short, for all practical purposes, the Badge Man figure, assuming it is a human being of average height and build, is located approximately 156 feet, 4.2 inches from MOORMAN's camera position, or 32 feet, 4.2 inches behind the stockade fence (along MOORMAN's line of sight). |
 |
| Next, I reproduced the computer and mathematical results using photographic methods. Using a Kodak Medalist II camera, [99] whose focal length (100mm) is identical to the MOORMAN camera, I exposed a series of images of a test subject standing at 124, 126, 154, 156, and 158 feet from the camera. In each case, for scale, the test subject held a yard stick at the facial plane marked with white tape at six-inch intervals. The subject also held an 8.5 x 11" white card with the distance in feet to the camera written in black. A number of images were shot in both black & white and color using 120mm film. [100] |
 |
| The size of the test subject as it appeared in the resulting contact prints [101] was then measured and compared to size of the Badge Man figure as it appeared in the MOORMAN print. It was found that the test images that best matched the original MOORMAN print were those photographs exposed at a distance of 156 feet. [102] |
 |
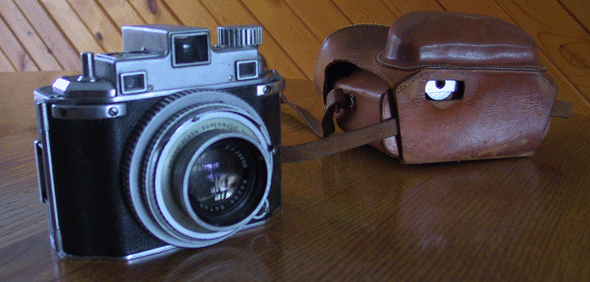
| Next, I duplicated the results of the Medalist experiments using a vintage Polaroid Highlander Model 80A camera, [EXHIBIT 10] the same model used by Mary MOORMAN in 1963. Since Polaroid film is no longer manufactured for this model camera, I purchased a roll of 120mm Kodachrome Vericolor film, which is typically used to shoot school portraits. This high grain color film provides extremely sharp images and good contrast, which was perfect for my purposes. Using a camera changing bag, I cut several pieces of film from the roll and stored them in a light-proof envelope. Each sheet of film was then loaded into the back of the camera, one at a time, and exposed. The resulting negative images were the exact size of MOORMAN's original print, and consequently, measurements taken from the resulting contact prints would directly correspond to the size of images present in MOORMAN's original print. |
 |
|
Once again, a test subject was photographed at a distance of 156 feet. The resulting exposures were developed and contact prints made. Measurements of the test subject taken from the contact prints were compared to those of the Badge Man figure obtained from the digital MOORMAN print. The results show that both figures matched in size, which means of course, that the Badge Man figure, if human, was indeed approximately 156 feet from MOORMAN's camera position on Elm Street. [103] Finally, I conducted the same tests at Dealey Plaza, Dallas, Texas – site of the assassination. Researcher Todd W. VAUGHAN served as my assistant. The night before the test, we located Mary MOORMAN's position just south of the south Elm Street curb. [104] We stretched a 300-foot cloth tape measure across Elm Street, from MOORMAN's position, over the corner of the retaining wall, and across the north-south extension of the stockade fence [105] until we reached the 156-foot mark. At that position, we could plainly see that in order for MOORMAN to photograph someone in the Badge Man position, that person would have to be elevated considerably off the ground. We decided that a step ladder would be needed to find the proper height of the Badge Man figure and made arrangements with our hotel to borrow one. |
 |
| The next day, [106] we returned to Dealey Plaza and setup both the Polaroid Highlander Model 80A and Medalist cameras (the Medalist being used as a backup) on tripods at the MOORMAN location. A step ladder was setup in the predetermined spot, 32 feet behind the fence along MOORMAN's line of sight. A series of exposures were made with the ladder placed 126 feet from MOORMAN's camera (immediately behind the fence line) and 156 feet from MOORMAN's camera (32 feet behind the fence line). In each case, Todd VAUGHAN stood on the step ladder at a height that matched the Badge Man figure's position as seen in the original MOORMAN photograph. Walkie-talkies were used for two-way communication to make adjustments in VAUGHAN's position. |
 |
 |
 |
 |
| Eight bracketed exposures [107] were made using the Polaroid Highlander Model 80A. After each exposure, the film was replaced with fresh film on-site using a camera changing bag. The exposed film was later developed locally. After reviewing the contact sheets, the best exposure was drum scanned in high-resolution and composited with the high-resolution digital MOORMAN print created earlier. All fixed objects (i.e., pergola, retaining wall, fence, etc.) were aligned and the size and position of the Badge Man figure compared with the size and position of test subject Todd VAUGHAN. |
 |
| As expected, both the test images and the original MOORMAN print matched in size and position when the test subject was photographed at the 156-foot position (i.e., 32 feet beyond the fence line) but did not match when the test subject was photographed at the 126-foot position (i.e., at the fence line as claimed by MACK and WHITE). |
 |
|
Based on the computer and photographic experiments conducted in both Texas and Michigan, I concluded that the Badge Man figure, assuming it is a human being of average height and build, is standing approximately 156 feet from MOORMAN's camera position - 32 feet behind the stockade fence, along MOORMAN's line of sight - at an elevation of approximately 4.5 feet. Photographs taken of test subject Todd VAUGHAN at this position from a variety of angles show him to be completely exposed to anyone in the area and at a height inconsistent with any reasonable viewing or firing position. It is worth mentioning that eyewitness Lee BOWERS, who had a clear unobstructed view of this area, did not report seeing anyone in the position described (more on this in a moment).
The conclusion I reached was, of course, the same conclusion reached in 1988 by British photographic expert Geoffrey CRAWLEY, who also determined that the Badge Man figure was standing considerably behind the fence line. The difference between CRAWLEY's placement of the Badge Man figure (12 to 18 feet behind the fence line) and my own (32 feet behind the fence line) are due to the difficulties in obtaining a precise measurement from the incredibly small area of the photograph which contains the three figures, and the differences in our approaches to the question of Badge Man's location. As described earlier, the image quality made it difficult to obtain a consistent measurement from one attempt to the next. For my part, margins of error compensate for any potential errors in achieving an accurate measurement. The position I ultimately selected for my photographic tests was the average of an error range of 25.125 to 35.575 feet behind the fence line (along MOORMAN's line of sight). My calculation was based on the size of the Badge Man figure's head as seen in the original MOORMAN photograph. Rather than assuming the figure's height, as CRAWLEY had, I assumed that Badge Man's head was the size of an average adult human head. CRAWLEY's range of 12 to 18 feet behind the fence (along MOORMAN's line of sight) was based on the assumption that the Badge Man figure was a human between 5 feet, 8 inches and 5 feet, 10 inches in height. An increase in the assumed height would push the Badge Man figure's calculated position even further back from the fence line. [108] For instance, based on CRAWLEY's calculations, if Badge Man were a human 6 feet tall, he would have been 24 feet behind the fence line; at a height of 6 foot, 2 inches, he would have been 30 feet behind the fence line. In all cases, the further back from the fence line, the more the figure would have to be elevated to be seen over the top of the fence. Regardless of the variations in our final results, CRAWLEY and I are in agreement that the Badge Man figure, if human, is standing considerably behind the fence line in an elevated position. |
|
|
Footnotes
|
Published by Oak Cliff Press, Inc., P.O. Box 608, Milford, MI 48381-0608 Webmaster |